Recent Posts
- Which Kind Of Company Will Be Good..
- Which Kind Of Company Will Be Good..
- Which Kind of Company Will be Good..
- Why India is Ideal for Digital Mar..
- 10 Best Countries to Work For Digi..
- Which Kind Of Company Will Be Good..
- 11 Best Countries To Work For Java..
- The Demand For Java Developers In ..
- Best Countries To Work For Web Des..
- Best Countries To Work For SEO Pro..
As a digital marketer, the most frequent question I have been asked is, how do I host my own website and domain in order to start my small business marketing or a blog?
It is a digital era, we know how significant it is to have an online presence for individuals and businesses to reach your potential target customers through a website or an e-commerce platform.
So, if you are looking forward to starting a website, and you have a tender foot in this, here's a complete guide on how to create a website from home, just for you!
“IT’S TIME TO TURN YOUR HOBBIES AND INTERESTS INTO BUSINESS.”
Accomplish your hobbies and interests into the business by creating a website with simple steps.
Having a website of your own has been a buzz now around the time. Let me tell you it's not that big of a deal to host your website. You don't have to look for someone who can do that for you.
Highlights:
Owning a website for free is a kickstart for your entrepreneurship career. Yes! Without even having a place to start a business, operate a website from any corner of the world, and mint money with your skills. You can
- Sell ad space on your website
- Be an Affiliate marketer
- Create an e-commerce platform (sell products)
- Lead generation to other companies
So, why wait when the world is your platform and the internet is your roadway to reach the targeted potential customers?
Website Hosting Guide With Simple Steps
This article, will help you learn from scratch on- How to host your website?
The important points you need to consider before you want to set up any website,
- Understand the purpose of your website (informational website, product-based website, service-based website)
- Specify a name for your domain (you can purchase the determined domain name from -Godaddy, Big Rock etc)
- Understand the basic technical aspects of creating and ranking a website.
Know these basics before you start creating a website on your own,
What is web hosting?
When an individual/ organization intends to have a web presence, web hosting is the service that allows them to post a website on the internet with special computers called servers.
Once, it has been hosted the users have to just type their domain and then the servers will deliver the respective web pages to the browsers.
The very first step in web hosting is to select a domain name and purchase your hosting plan.
What is a website?
A website is a set of webpages, which are developed using the markup language and in addition CSS and JS are used for styling and functionality respectively on the website.
Types of websites
There are two types of websites based on the content, functionality, and features needed on the website, they are named,
-
Static Website:
A simple website mostly with very few web pages put up on the server manually without the use of any content management system. Static websites webpages have to be manually created or existing webpage HTML has to be manually copied every time whenever there is a need for webpage creation.
Websites on which the content doesn’t change with the upload or change of content on the website until the changes are manually done across is a static website.
-
Dynamic Website:
Dynamic websites are websites usually with few tens, hundreds, and thousands of webpages which are all built through a content management system without the necessity of copying the HTML of the existing webpages.
Websites that have content management platforms built and allow to addition of any number of webpages quickly without much hassle and the content on the webpages/website too changes with the content upload or change of content.
Building a website in a few simple steps, you can have your website ready in less than 10 minutes.
- You don’t have to learn HTML, CSS or JS to build a website which all are used to build the front end of the website.
- You don’t have to master programming languages such as Java, Dot Net, C++, PHP, and more, there are a few tens of programming languages used to build the backends of websites.
Just for your knowledge explore the below topics before you quickly start with some ready-made work.
Before you start building a website on your own in a few simple steps know the basics of how websites are built,
Don’t worry, the technology is been made so simple by the technology geeks and hence everything is readily available, you may have to just install a couple of applications and other related stuff which I will be taking you through.
Website Front end,
The website front end is the appearance of the website which is visible to you and is accessible by visiting the website address (URL/domain).
The website front end appearance can be as simple and plain as your word document without any styling for which just a HTML is enough.
But we all know that many prefer websites to be colorful, need to have a proper alignment, spacing between text and many more and that’s when the CSS is used to improve the appearance of your website.
The HTML and CSS together makes the website beautiful and that is not enough when you need to have a functionally on the website, E.G: sign up on the website, pop up on the website or any other functionally, which will be build using JavaScript.
Website Backend:
Website backend is a platform built using a programming language in order to perform the set of actions which may or may not be visible in the front end.
The content published to the website is visible in the front end,
The features or functionalities those are built to upload content to the website are not visible, similarly if an automated email has to be sent to the user who sign up on website the backend functionality/program takes care of it, likewise there can be few tens of features build in order to make the website usable.
The backend also includes data based, which stores all your website information in rows and columns as you store data on excel sheets.
Hope you have some idea on how a website is been built, and there will be a ton of efforts from experts if a good looking and functional website has to be built.
But luckily you are in an era where everything is made simple, you don’t have to learn front end development or backend and still you will be able to create a beautiful and functional website for your business.
Wondering how to create website in simple steps?
No worries, you can simply follow the below steps and build a website in less than 10 minutes.
Step1:
Remember you don’t need to learn the front end development (HTML, CSS and JS), just follow the below steps,
Know what you want to do on a website, such as,
- Want to sell your products/services
- Want it to be just a catalog/profile of your products/services
- What kind of products or services are they, how should be the information displayed about those products and services?
- Need any other feature both on the front end and the backend,
Once you have enough clarity on the above you can just visit the portals which sells the front-end work, which usually will be called as theme.
Step 2:
Picking the Theme/Knowing how your front end should be:
There are few tens and hundreds of portals which are selling the designs needed for your business and many times it all will have all the features/appearance that you are looking for, and hence you can explore the themes here and pick the one you like,
Theme forest screen shot,
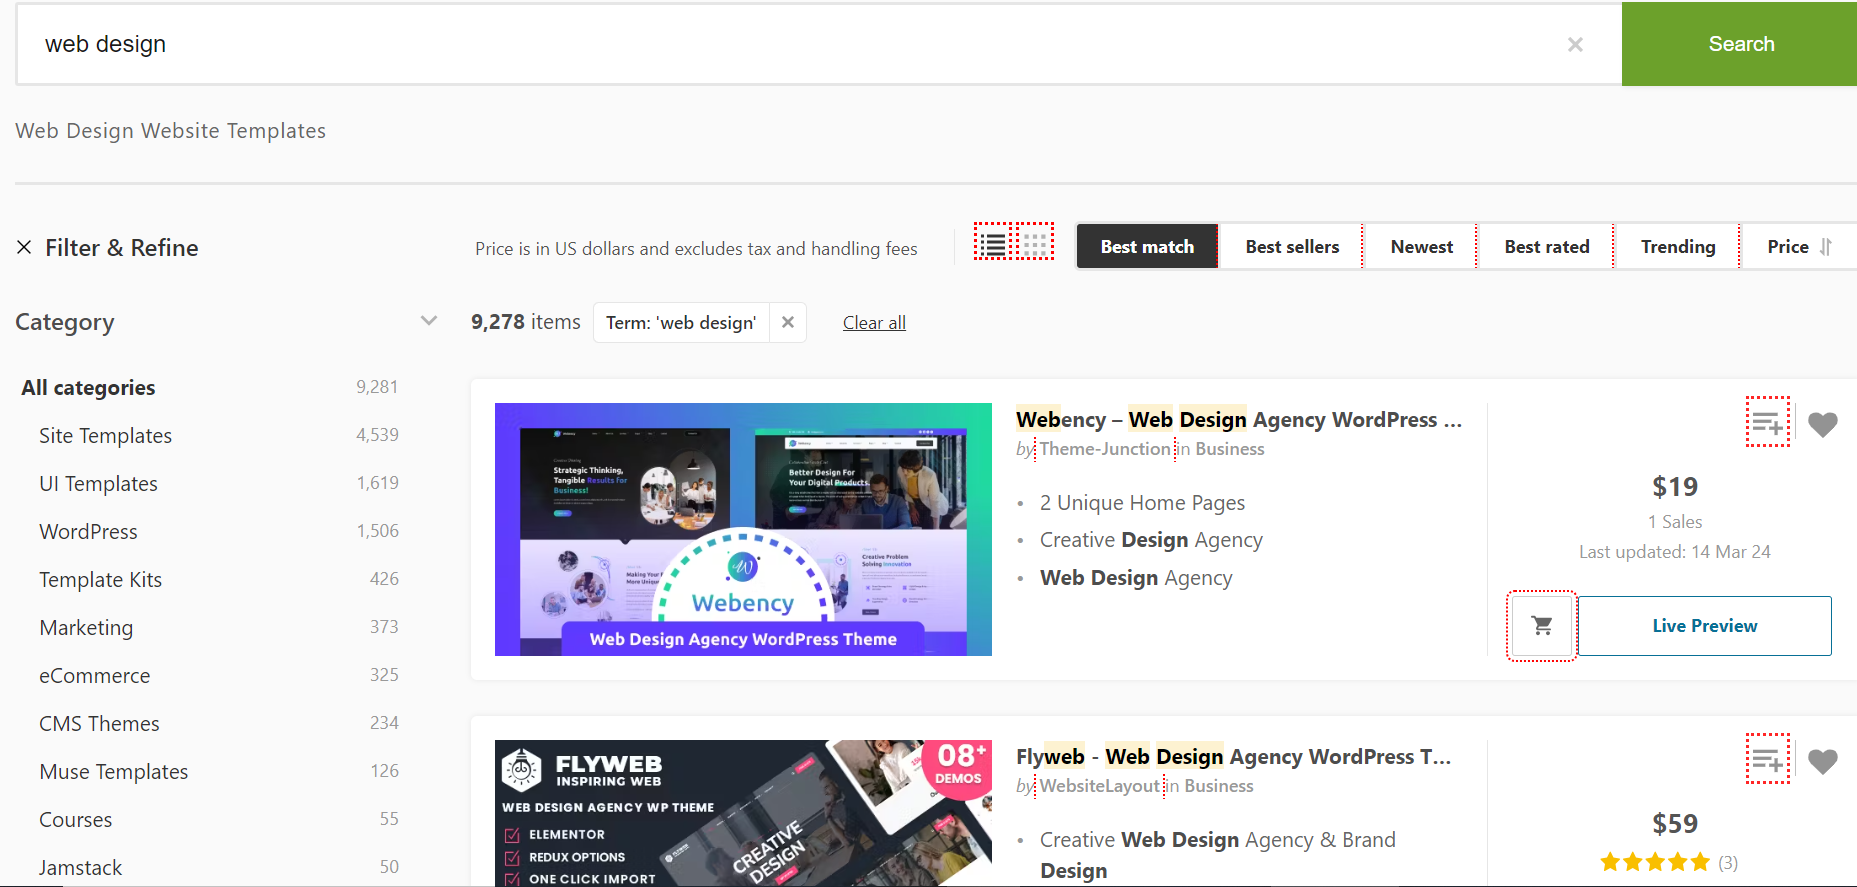
Theme forest is a market place for selling and buying the website themes and which has the biggest repository of themes pertaining to wide range of categories and one can find themes for almost all kind of business.
Before you pick the theme or front end of your website you have to understand how to use the theme or set it up, so that you can put up your website in use.
Step 3:
Prerequisites before you proceed with the step 3:
In order to put your theme in use you need the following,
- Domain Name, mapped with the IP of your hosting: The name of your business and the name which you can use in order to help people finding your business by typing in the name in the address bar of the browser.
- Hosting space/Server
- Content Management system (I personally suggest WordPress)
- SSL certificate, which is compulsorily needed in the coming days as only the secure connection websites will be preferred to browse by the users
To set up a theme you need a back end and you don’t have to worry about coding, just consider doing the following,
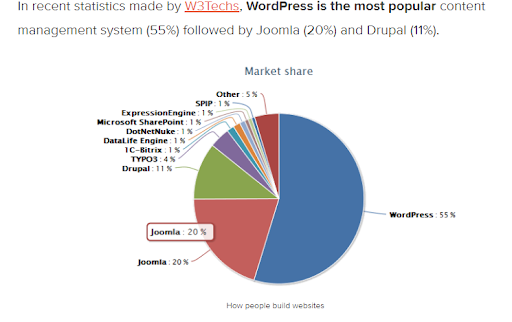
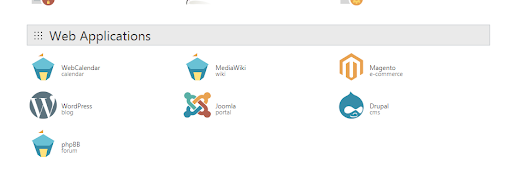
Download a readymade backend or content management system such as WordPress, Joomla, Drupal or any other from the respective community/organization or authority websites, I suggest to download a WordPress application from wordpress.org, as it’s the advanced and most used compared to any other open source CMS (Content management system). WordPress is built in PHP and it’s all a community contribution.
Step 4:
Create a data base on your server, you may have access to cpanel of your website host and which will allow you to perform various kinds of action on your server, including settings changes, installation, deletion of applications, creation of data base and more, from the same interface create an data base. If you don’t have Cpanel access for your website you may have to speak to your web hosting provider
When you create a data base, it will have the host name, User name and password, which need to be updated during the set up on website and hence make note of those details.
Step 5:
Linking website and data base
Once you are done with the installation of WordPress application in the root directory of your website host/server you can visit the website and you will see the data base connection interface and the set-up wizard
Now just provide the data base details which you have noted down in the previous step and you are all done, the website and the database are linked.
Step 6:
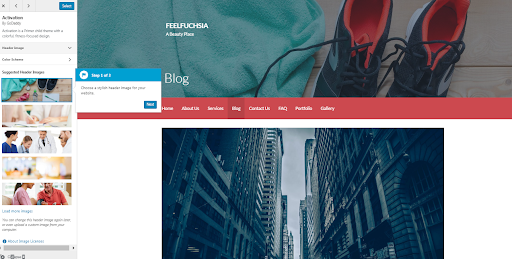
Providing the basic details and picking up the theme
One the website and data base linking is done you will be asked to provide some basic details such as category of website, email id, phone number and other, and for the theme of your choice. You can pick a default theme and later you can build your website as needed using one of the WordPress theme builders or simply upload the theme that you have downloaded from Themeforest
Uploading the theme,
Go to appearance > Themes > Upload theme
After uploading the theme, the theme default plugins installation will be enabled and you can proceed installing those plugins. In case if you are editing your default theme you have to install several plugins based on the requirement of the functionality or feature on the website backend or front end.
Step 7:
Installing the plugins, just below the appearance section you can find the plugins tab and you can search for the plugin based on the feature or install them or you can directly search on Google, download plugin and can be uploaded and enabled to make use of the feature.
The plugins are available for free and for more features you may have to buy or have to install the appropriate plugins for all the features for free.
Step 8:
Editing the Theme
The themes you purchase from sites like theme forest will have the best sellers who can support you in the installation and also in fixing the bugs, and many times you will have an option to import the demo as you see on the Themeforest portal and hence there is a necessity of changing the content such as text, logo, images or any other content and the website and you should be able to do all of it by yourself.
You have find the customization options under
Appearance > Theme Customization
Appearance > Main menus
Appearance > Widgets
Note: You have to explore all the options available on the WordPress content management system, do a trail and error until you are comfortable with all the options and features available with the CMS, Plugins and Themes, once you are comfortable you can take control of your website and customize as needed.
Step 9:
Content upload to the website,
The WordPress content management system allows you to handle the settings for the URL structure, admin email ids, profile and lot more
The WordPress CMS will have multiple sections for publishing the content,
- Pages categories
- Pages
- Post categories
- Posts
- Post Tags
- Media upload
You can add as many numbers of categories (Post and pages) and tags you want, the categories can have as many sub levels as possible.
Once you have the pages categories ready you can publish the pages, which usually pick the default design of the theme that you have set for your website and you don’t have to write any HTML or you don’t need to replicate/copy paste until it’s a custom built on WordPress using any of the theme builder plugin available such as Beaver, WP Bakery, Elementor and more.
Similarly, you can create and post category and for every post you publish you can tag them to respective category and tags.
You can upload the media such as images and videos and they all can be found under media section, which can be later used at the required instances in the post or webpages. Alternatively you can directly upload the image or video into the post/page and the same later will be available under media section for usage of the same in any other instances needed.
Step 10:
Not confident of building a website on your own? Just forget all the above steps and straight away follow my guide which is explained with an example,
We have taken an example of building website using the GoDaddy domain and GoDaddy hosting,
Here, we are hosting a website with Godaddy account in simple steps.
Once you get on to the GoDaddy website. It looks like this.
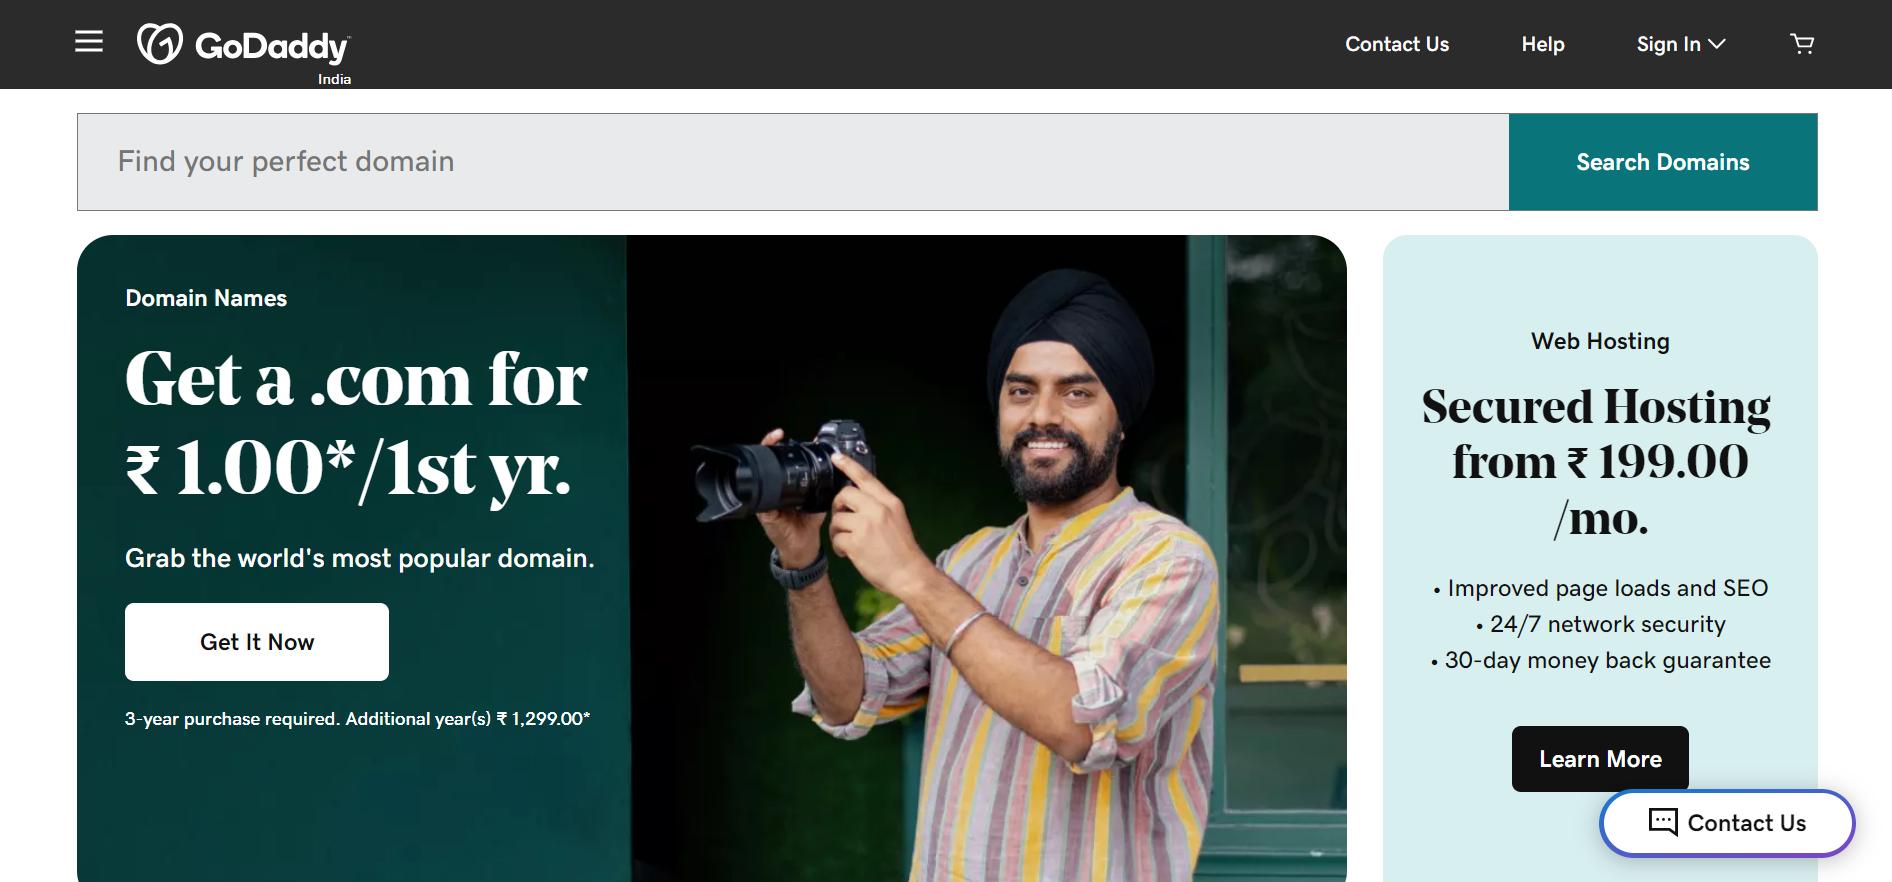
Firstly, create an account there and sign up with Godaddy or log in if you have already have an existing account.
Check and determine the availability of your domain name (web address) (eg:yourname.com)
After you have logged in purchased the domain, Click on the GoDaddy logo.
On the home page, you will have to click on the hosting on the top-left fold of the page and then click on the web hosting.
You will be presented with a set of hosting plans like starter, economy, deluxe, ultimate as below.
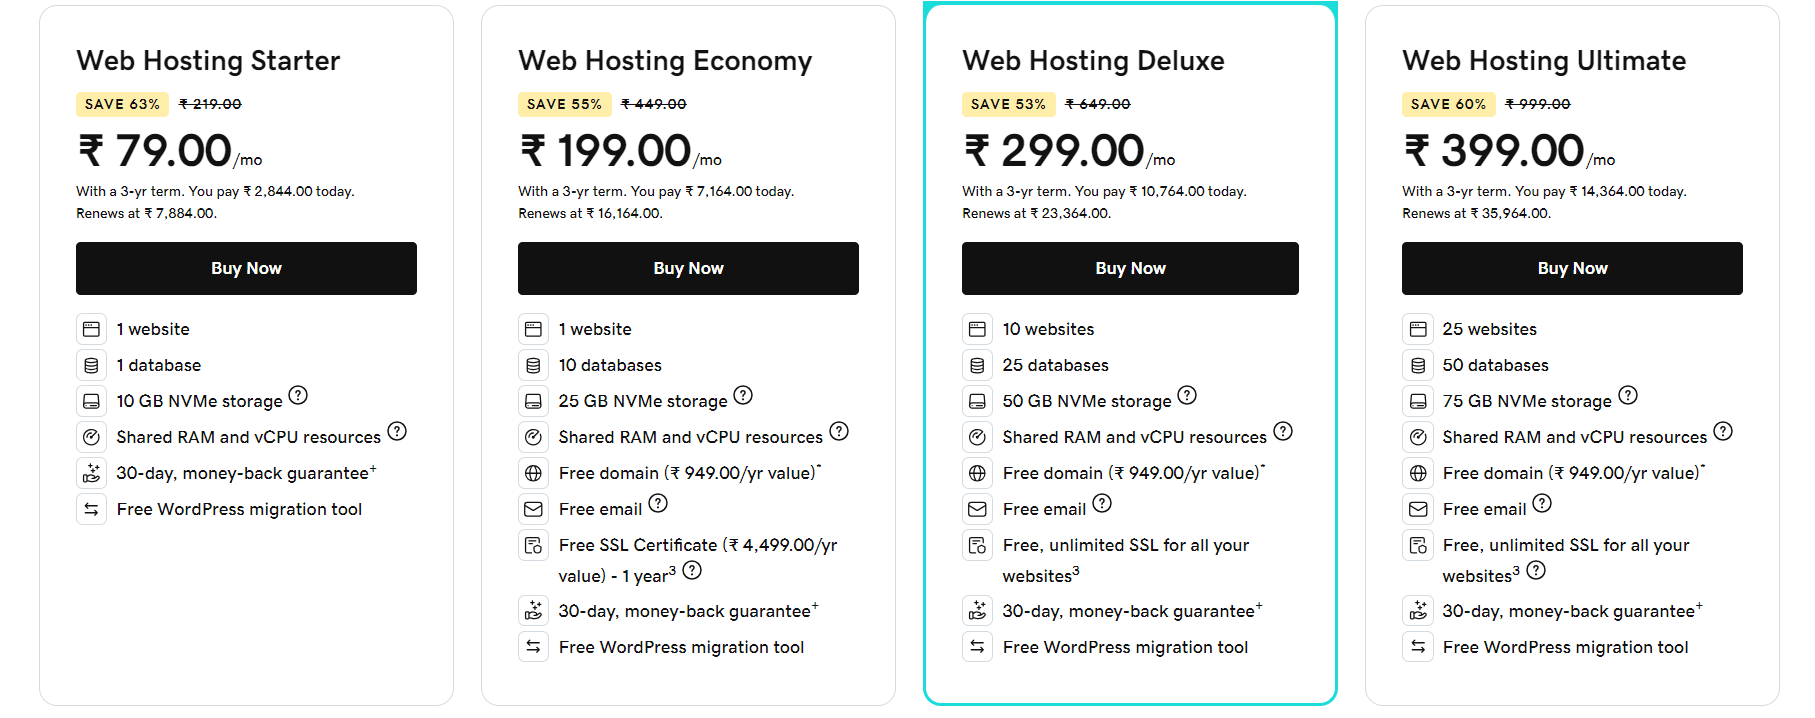
The features of the Godaddy hosting plans are listed below:
- Starter- this is more flexible if you are a starter and you have to host a single website, this is a basic setup which is availed at a low cost. You will be able to host one website with 30 GB space and unmetered bandwidth which means, (refer image below).
- Economy- As the name suggests, it is economical which is again useful for a starter website, with a little extended features. You are assisted with 24/7 support, 100 GB storage and free business mail for the first year.
- Deluxe- this is a superior plan offered to host multiple websites. You have special features and flexibility with unlimited storage, unlimited websites and unlimited subdomains.
- Ultimate- this is the advanced plan that appears along with deluxe features in addition to 2x processing power & memory, Free SSL Certificate for one year, Free premium DNS (which helps in prevention of other people accessing your website by providing additional security in turn helping in the overall performance of the website)
Make a wise choice from the above list, rooted on your requirements and your website types.
You are provided with choices, you can settle for one that is most appropriate for you , just click on add to cart and make purchase for the period you want to extended your hosting plan. The buying options varies from one month, 12 months, 24 months, 36 months and the prices reduce as the months are extended.
Note: If you are looking for a pretty fast loading website the basic plans may not hep when you have too many applications or heavy content on the server and hence suggest you to go with the business plan, which usually provides a dedicated ram and many other resources only for you, the prior basic plans are all shared hosting’s and is not suggested for heavy websites.
Also, you don’t have to necessarily go with the GoDaddy hosting you can purchase the hosting from any other hosting providers, which are been rated as best as compared to GoDaddy. If in case if you are using a hosting service from HostGator, Bluehost or any other hosting service providers you just have to map the DNS, which is very simple and can be done by anyone just by exploring the c-panel or you can get in touch with your hosting provider who can guide you on the same.
If you scroll down the page, you have options to add a website backup which is not mandatory. You also have options available to enhance the quality and security of your website by adding essential security and SSL certificate. (not mandatory)
Select the ones you require and click on “Continue with These Options” button.
What is SSL certificate?
It has recently become a norm to have a secure website, basically to launch a website with secure sessions on browser, which means you are establishing a secure connection with the server while making credit card transactions, data transfer and logins, and social media sites.
To power your website, implement Hypertext Transport Protocol Secure (HTTPS) rather than the old HTTP, which is useful in combining HTML support with TLS (Transport Layer Security).
After checking and unchecking the backup, essential security, SSL certificate options, you are at the last step of getting a hosting plan.
Finally, you will be led to the purchase page, enter all the details. Insert the card number and make the billing process. (you can also select the payment method- credit card, debit card, net banking). Get the otp and enter and submit.
Once you have done the payment. Your bill will be processed with your name and address. You will get notified with a thank you message along with the order total. The receipt will be sent to the mail id.
Now that your web hosting plan is ready. You can insert the domain name that has been purchased previously from your account. In Case, you have purchased a domain from elsewhere the “Enter a Domain or subdomain” in the space provided.
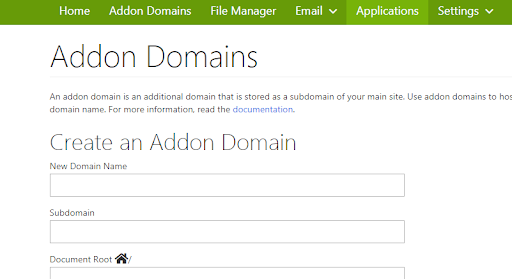
Once your domain has been added, you are halfway there. Since, in my hosting plan I have hosted a couple of websites, this tutorial website will be selected as a add on domain.
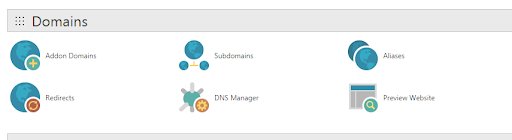
What is Addon Domain?
An addon domain is nothing different from the primary domain that you will be hosting. It is similar to multiple hosting’s with the same control panel. This is also a fully functional domain but sharing the same control panel that you have hosted from your account. You can as well, create a separate forwarder or email address for this website. You don't have to worry about it unless you have hosted multiple websites with your multiple hosting package. To sum things up, the Addon domain will display your domain name and will wholly perform as a separate entity.
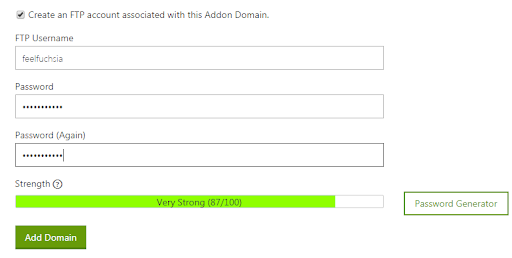
Next step is to create a FTP account associated with your domain.
What is FTP?
FTP is abbreviated as File Transfer Protocol. It is a software structured to transfer files. It has key role in the data transfer connection for migrating files with the help of an active website hosting server. FTP server connection is an elementary service provided by the web hosts as it builds connection between computers on a network.
Provide an FTP username. Create a password and add the domain as shown in the picture.
You will be choosing a “Content Management System” and install an application to your website which makes it easier for you to access your website unlike coding a website with the HTML pages, which consumes a lot of time.
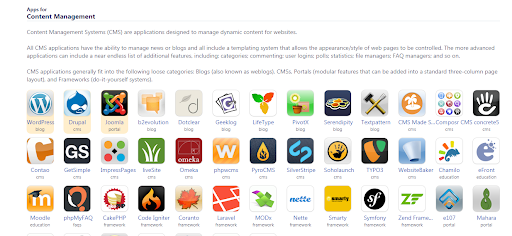
Based on a valid research, we have picked “WordPress” to create a website. Which is exclusively free and user-friendly.
As “WordPress Hosting” is in the limelight in the digital community, it is also importance to understand what makes it the best and top rated among other backend.
WordPress survey claims that:
First off, the total number of websites hosted among our respondents is 11,736. Wow!
Albeit this survey has reached WordPress pros most of all, actually more than 50% of the respondents report to receive less than 5,000 unique visitors a month. On the other end of the spectrum, only 24.22% get more than 20,000 UVs, and the rest falls somewhere in between.
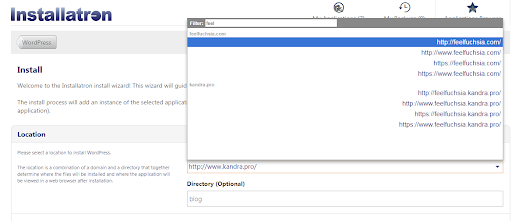
Click on Wordpress to install.
You will have enter the domain name and enter the rest of the details .
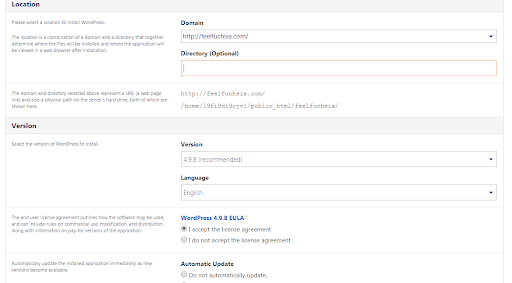
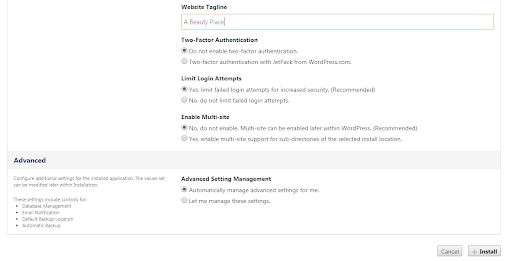
Enter your personal details such as username, password your administrator mail id along with your website title, website tagline.
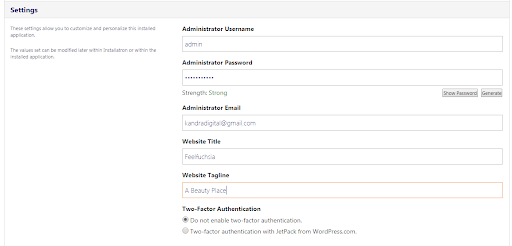
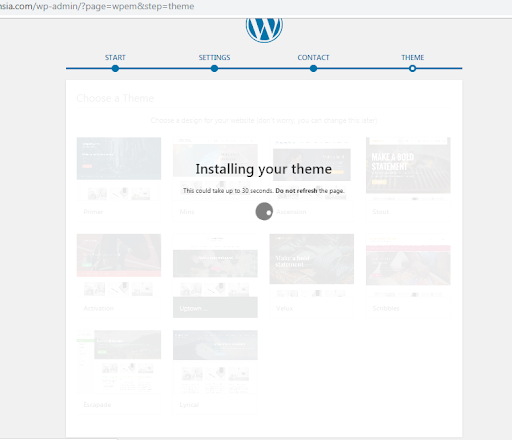
Once details are entered, WordPress is getting installed to the respective domain.
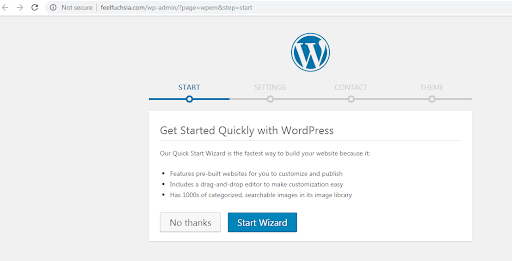
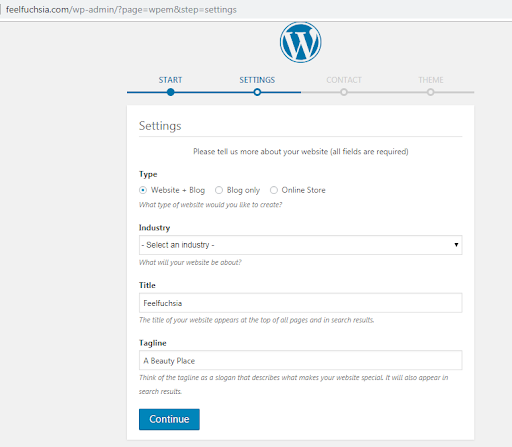
In the next step, provide details and brief about the website you are creating. Choose the purpose - website+blog, blog only or an online store.
Also choose an industry you will be operating in. Enter the title and a tagline and select on continue.

Further, enter the email id, existing phone number, address. There is also an option to add your social media profiles and click on continue.
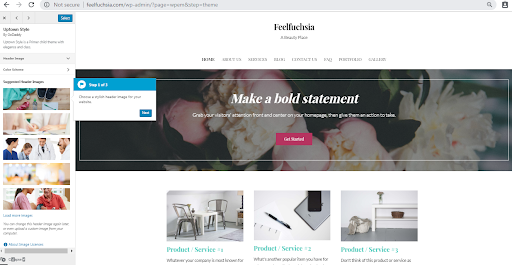
Well, you’re just one step away from getting your website live. The exciting part about this final step is you can get a theme for a website with the available options for free.
Pick a theme and install it to your website. Don’t worry you can change the theme whenever you need it or you can edit the same theme if you are using any of the WordPress editor plugins.
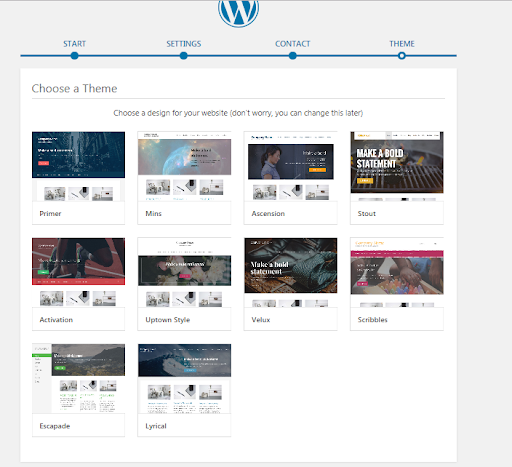
You don't want the look and feel of your website to be the same as the other websites. Hence, you have the option to customize the website the way you want it.
Once you are done up to this stage follow the steps 6,7,8, & 9 and customize your theme, install the plugins needed for the functionality or any other specific feature in the theme and you can also upload content to the website.
Next thing u want to do is click on “My Account”. Scroll down and click on Web Hosting and this will bring up the domains that you have in your account. Select the domain and click on launch.
And that is it, can you believe you are just a click away to have a website of your own.
Once you login with the credentials. You name will be shown the left corner. Click on the domain name. And this is where you check the availability of the names and make a decision on the best suitable for your purpose. You can either choose .com, .net, .in, .org, .info (anything of your choice). (based on the cost)
Add to the cart- with the choice of year of payment you want to make.
In the next page you can add additional email to your website
Later, you can choose your hosting plan and click agree to terms and make your payment.
Once you are done with purchasing it takes barely 15-20 mins to set up the account
Next thing you want to do is click on “My Account”. Scroll down and click on Web Hosting and this will bring up the domains that you have in your account. Select the domain and click on launch.
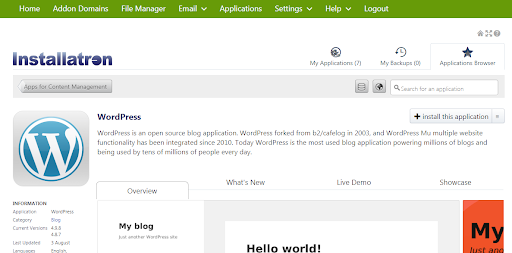
You will view this page-
Here, u need to add the application, we are typically using WordPress here as it very handy and user friendly for creating the website. So download WordPress and add it to your database..(Install application)
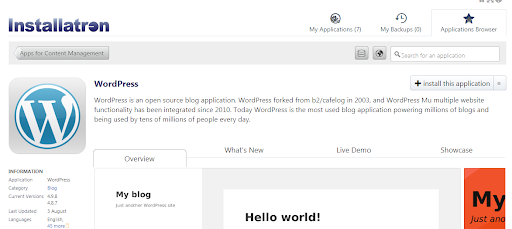
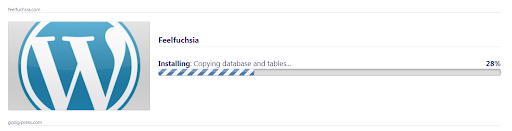
Installing application.
Next step is creating your database password.
Root directory and keep the box blank
Next put the admin name, password, email, and your blog name -hit finish.
Now GoDaddy is installing the WordPress application to your account (it takes 5-10 mins)
Go back to my account on the left corner.
Once u go back to this page. On the right side it shows installing.
Once it’s done installing on the database.
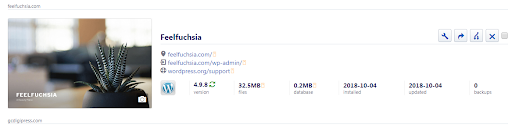
Now u can type your address on the url bar and check your website.
U can login and customize everything you want.
To host a website, you’ll require a hosting address which you get by a hosting plan
You will choose any application to support your backend, install it to your root directory. And push the database to the folder created.
It’s like creating a folder.
Summary:
I have seen many people struggling to understand how the websites are built and finally end up wasting a lot of money paying for readily available platforms which usually charge a hell lot of money on a monthly basis for a simple website, typically which you can build on your own at 1/10 of the spend.
How to build a website is a most common question from the small business owners, people learning to build a website on their own or someone who is looking for to have a website as a hobby to publish their experience either as a blog, video or images.
If you are one falling into any of these categories and looking for to have one website, this article will be taking you through the options which you can rely on to build a website,
This article focuses on explaining the things those are needed even before you start with the method of creating a website,
To develop a website, you need to know HTML, CSS and JS and for sure if you have to learn and develop a website it takes you couple of months and even after that you may not be in a position to develop a dream website.
To develop a dynamic website with functionality you have to be good with at least one programming language and learning this also is not that easy and may times few months of time is needed for you to learn and build a website on your own.
Want to Level Up Your Skills?
LearnNThrive is a global training and placement provider helping the graduates to pick the best technology trainings and certification programs.
Have queries? Get In touch!